
When Are Apples Ready? A North-Central Ohio Harvest and Storage Guide
Learn how to judge apple ripeness, pick without damaging next year's fruiting wood, sort the harvest, and keep apples crisp longer in north-central Ohio.
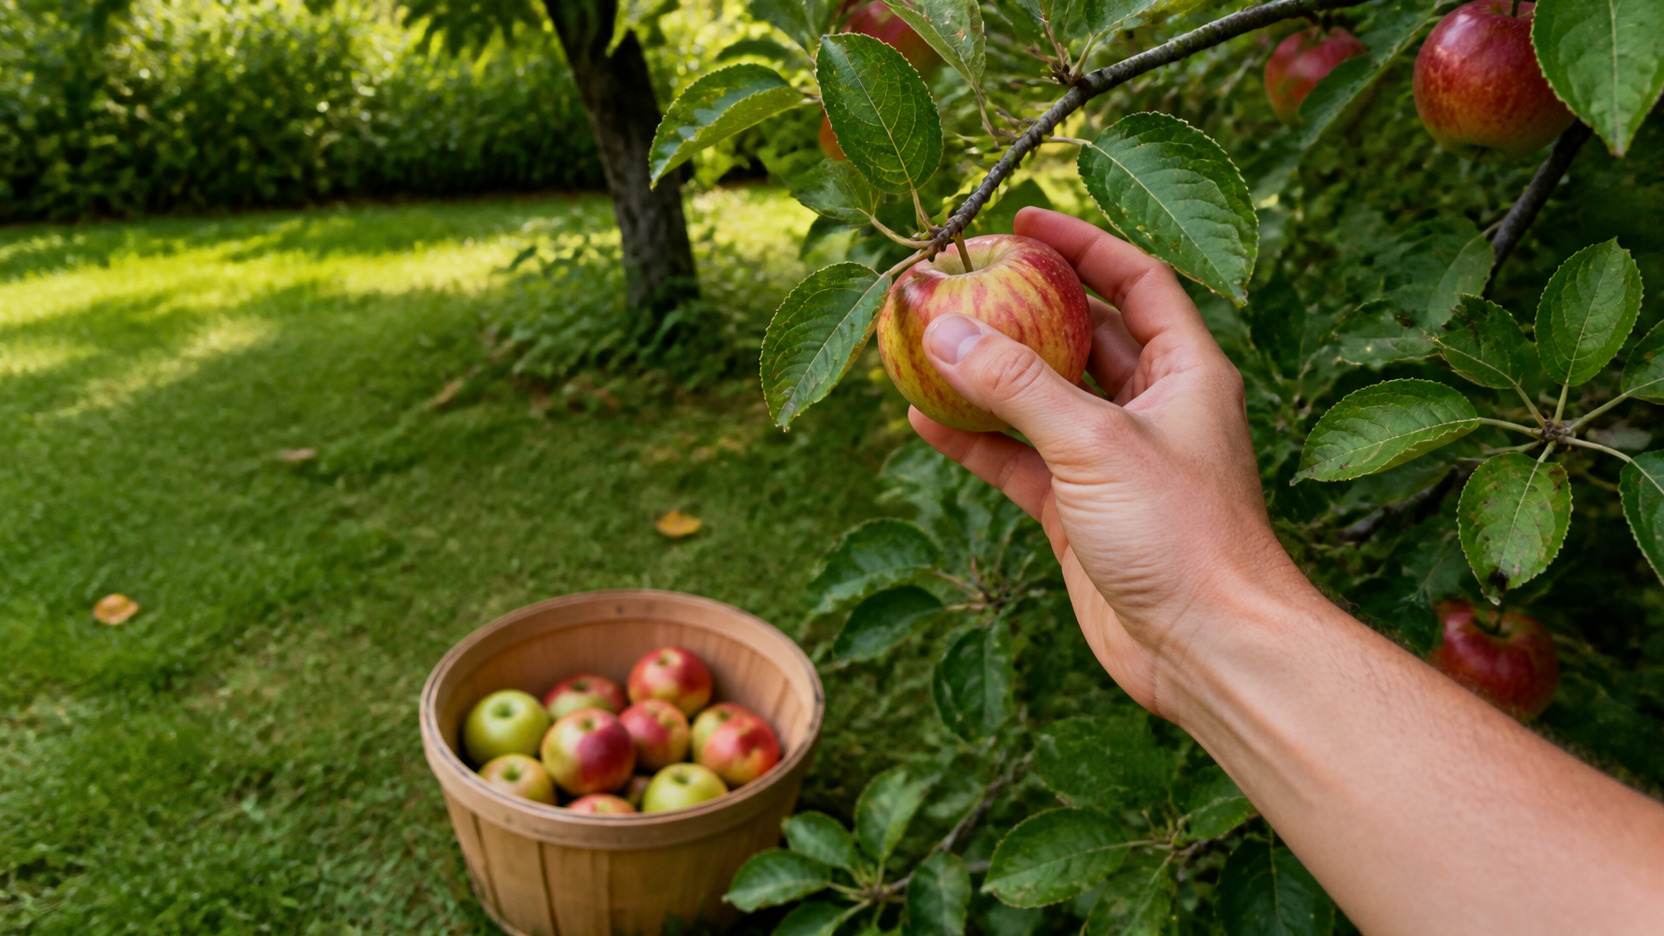
Late August can make an apple tree look ready before every apple actually is. The sun-facing fruit may be fully colored, a few apples may already be on the grass, and one branch may taste sweet while another still tastes green and starchy. Around Galion, that is not a signal to strip the tree in one afternoon. It is a signal to begin checking.
Apple harvest is a window, not a single date. Variety, weather, crop load, and the position of each fruit on the tree all affect maturity. Ohio State University Extension advises home growers to watch for changes in the apple’s background color and flesh, then use crispness, juiciness, and flavor as the final test. That practical approach is more dependable than trusting calendar dates or red skin alone.
This guide explains how to recognize that window, pick fruit without tearing off next year’s fruiting wood, separate keepers from apples that should be used soon, and create better home-storage conditions. It is written for backyard trees and small harvests in north-central Ohio—not commercial controlled-atmosphere storage—and it leaves room for the most important fact of all: different apple varieties ripen on different schedules.
Late August Is the Start of a Window, Not a Deadline
In Ohio, apples do not all mature together. Ohio State’s current home-orchard guide groups recommended cultivars into early, midseason, and late ripening periods. An early apple can be ready while a late keeper on the same property still needs weeks. Even two trees of the same variety may move at slightly different speeds because of sun exposure, soil moisture, pruning, crop load, and local conditions.
That makes a printed harvest date useful as a reminder, but not as permission to empty the tree. Start with the variety name if you know it. Nursery records, an old plant tag, or a reliable orchard description can tell you whether to expect an early, middle, or late harvest. Then let the fruit confirm the timing. Do not transfer an exact date from another state—or even another Ohio property—to your Galion backyard without checking the apples themselves.
Plan on more than one picking. Fruit on the outside and south or west side of a canopy often receives more light and may color or mature before shaded fruit inside. Walk around the tree, sample from more than one side, and return every few days. A staggered harvest gives the later fruit time to improve while reducing the chance that ripe apples become overripe or fall.
Windfalls are another clue, but not a verdict. A sound, mature apple may drop, but so may fruit damaged by insects, disease, birds, wind, or a weak stem. Cut open representative apples from the tree instead of deciding from the ground alone. The goal is to combine several signs until they point in the same direction.
Five Signs an Apple Is Ready to Pick
No single test works perfectly for every variety. Red color can develop before the flesh is ready, seed color can vary, and a hot spell can change how fruit behaves. Use a short checklist and give the taste test the final say.
| Check | What to look for | What it does not prove by itself |
|---|---|---|
| Background color | The non-red portion shifts from hard green toward greenish yellow or yellow, depending on the variety. | A red blush alone can appear before maturity. |
| Flesh | Cut fruit loses its greenish cast and looks white or creamy; texture is crisp rather than woody or mealy. | White flesh does not replace a flavor check. |
| Flavor | The apple is juicy and tastes like its variety, with sweetness, acidity, and aroma replacing raw starchiness. | One exposed apple may be ahead of the shaded crop. |
| Release | A mature apple usually comes away with a gentle lift and twist. | Easy release can also follow damage or over-ripeness. |
| Pattern on the tree | Several representative apples show the same changes over a few days. | One windfall does not mean the whole tree is ready. |
Begin with ground color. Look at the portion of skin not covered by red striping or blush. Ohio State describes the base color changing from green toward yellow as maturity advances. Some varieties remain greener than others, so compare the fruit with itself over several days rather than demanding one universal shade.
Next, cut an apple. Look at the flesh, smell it, and taste it. Ohio State’s advice is refreshingly direct: a mature apple should be crisp, juicy, and pleasing to eat. The University of Minnesota Extension likewise recommends tasting fruit once it appears fully colored and waiting a few days if it remains too starchy. A notebook entry such as “August 27: outer south side sweet; inside canopy still starchy” is more useful next year than a vague memory.
Seed color is often mentioned as a home test, but it should be supporting evidence, not the judge. Seeds commonly darken as fruit develops, yet the relationship is not exact for every cultivar and season. Likewise, an iodine starch test can be valuable for experienced growers, but most backyard harvests do not need laboratory-style scoring. Background color, texture, flavor, and repeated sampling are enough to make a sound household decision.
Pick the Apple Without Harming the Tree
Good picking is gentle. Cup the apple in your palm, lift it, and twist in one smooth motion. The University of Minnesota Extension warns against pulling or yanking because the short fruiting spur can come off with the apple. That spur may carry future flower buds, so a rough harvest can trade one apple today for lost production later.
If the apple resists, stop. Resistance may mean it is not ready, or it may simply be attached at an awkward angle. Support the fruiting spur with one hand and lift and twist with the other. Do not bend branches down until they crack, and do not shake a tree to save time. Shaking bruises fruit, mixes good apples with damaged ones, and makes careful sorting harder.
Use a shallow picking container or a padded basket rather than a deep bucket that lets fruit pile heavily on itself. Lower each apple into the container; do not toss it. An apple can bruise without breaking the skin, and that hidden injury shortens storage life. Empty smaller containers into storage boxes before they become heavy enough to compress the bottom layer.
Work from the ground whenever possible. For fruit beyond safe reach, use a purpose-built fruit picker or a stable orchard ladder used correctly. Ordinary straight or folding ladders can become unstable on uneven turf, and reaching sideways with a full picking bag compounds the risk. No apple is worth a fall. If the tree has become too tall to harvest safely, make a pruning plan for the dormant season rather than improvising at harvest.
Keep picked fruit shaded. A basket sitting in direct late-summer sun gains heat quickly, and warm fruit takes longer to cool. Move each load to a cool indoor place, then sort it before refrigeration. Cooling promptly is one of the simplest advantages a home grower can give the harvest.
Sort Before You Store
Storage starts at the tree, but sorting decides which apples belong there. Set up three groups: long-term keepers, use-soon fruit, and discards. This is not about making the harvest look perfect. It is about preventing one leaking or decaying apple from affecting sound fruit beside it.
Longer-storage candidates
Choose firm, sound apples with intact skin and no puncture, active decay, soft bruise, or insect tunnel. Keep the stem when it comes away naturally, but do not puncture neighboring apples with it. Handle these apples the least and cool them promptly.
Use-soon apples
Put small bruises, superficial skin marks, odd shapes, and other imperfect but wholesome fruit in a separate container. FDA guidance says to cut away damaged or bruised areas before preparing or eating fresh produce. These apples are better for the next few meals, baking, sauce, or prompt freezer preparation than for weeks of storage. Wash them under plain running water just before preparation—not with soap or produce wash.
Discard or compost appropriately
Discard fruit with visible mold, spreading rot, a fermented odor, extensive insect damage, animal chewing, or contamination you cannot clean away. Composting depends on the condition of the fruit and how your compost system is managed. If you are dealing with a recurring orchard disease or insect problem, follow Ohio State Extension guidance on orchard sanitation rather than assuming every damaged apple belongs in a home pile.
Do not wash apples before ordinary refrigerator storage. Added surface moisture can encourage decay, and washing does not repair a bruise. Instead, brush away loose debris gently, refrigerate dry fruit, and rinse it under running water immediately before eating or cutting. Wash your hands and use clean knives, boards, and containers when preparing the fruit.
Build Better Home Storage Conditions
Cold, humid, and clean are the three useful words. The University of Minnesota Extension places ideal apple storage around 33–38°F with high relative humidity and identifies the refrigerator as the best home option in most cases. A refrigerator is more dependable than a garage or basement because outdoor swings can make those spaces warm in September and freezing later in fall.
Do not crowd fruit into an airtight wet container. In a dry refrigerator, use a perforated produce bag or loosely covered container to slow moisture loss while allowing some air movement. Place apples gently in one or two layers when space allows. Keep a small group of use-soon apples separate so the storage box is not opened and handled every day.
Inspect stored apples at least weekly. Remove any apple developing a soft spot, leak, off odor, or decay. Rotate the container enough to see the lower layer without repeatedly dropping or rolling the fruit. Storage is not a pause button; every apple continues to respire and age, and varieties differ greatly in how long they remain crisp.
Keep apples away from foods that readily absorb odors. Apples also produce ethylene, a natural ripening gas, so separating them from ethylene-sensitive produce can help avoid unwanted changes elsewhere in the refrigerator. A dedicated produce drawer or labeled refrigerator bin works well for a household quantity.
A decorative bowl is fine for apples you intend to eat soon, but it is not long-term storage. Warm room temperatures speed softening. Bring out a few apples at a time and leave the rest cold. If the harvest is larger than the refrigerator can hold, prioritize the soundest known storage varieties, process use-soon fruit promptly, and share the surplus while it is still good.
Match the Plan to the Variety
Some apples are built for quick eating; others improve the household’s fall storage options. Ohio State’s 2025 home-orchard guide describes early, middle, and late cultivars with markedly different keeping qualities. For example, it notes that Redfree can store for a month or more under refrigeration, Enterprise stores well refrigerated, and Goldrush has exceptional storage life. Those are cultivar-specific descriptions, not promises for every backyard apple.
If you know the variety, look up guidance from an extension source or the breeder. If you do not, run a small experiment. Label a sample with the picking date, refrigerate it, and taste one apple each week. Record texture, flavor, shriveling, and any decay. Within a season or two, you will have a practical profile of your own tree.
Do not mix picking dates or varieties without labels. A soft early apple hidden among firmer late apples can be overlooked during inspection. Use removable labels on bags or boxes: variety or tree, date picked, and intended use. That simple record also shows whether waiting three extra days improved flavor or merely increased drops.
Use quality, not pride, to set the plan. The most colorful apples are not automatically the best keepers, and the less perfect apples are not automatically waste. Crisp, sound fruit earns refrigerator space. Sound but bruised fruit moves to the kitchen. Overripe fruit may still make sauce if it is wholesome, while moldy fruit does not become acceptable because it will be cooked.
Use or Preserve the Rest Safely
A mixed harvest is easier to manage when every grade has a destination. Keep the best apples cold for fresh eating. Use slightly bruised fruit promptly after trimming damaged areas. Choose firm, full-flavored apples for freezing and follow a tested method rather than inventing proportions.
The National Center for Home Food Preservation provides tested directions for freezing apples in syrup, sugar, or dry packs. Its dry-pack option treats slices to limit darkening, allows them to be tray-frozen, and then packs the frozen pieces into containers. The page also specifies preparation, anti-browning treatment, headspace, and packaging details. Follow the complete current directions at the source rather than relying on a shortened summary.
For applesauce, butter, juice, or canned slices, use a tested recipe from Ohio State University Extension, the National Center for Home Food Preservation, or the USDA Complete Guide to Home Canning. Acidity, jar size, preparation, elevation, and processing time matter. A family recipe can guide flavor, but it should not replace a tested preservation process for shelf-stable food.
Freezing is often the most flexible choice for a modest backyard surplus because it separates harvest day from baking day. Label packages with the variety, preparation, and date. Freeze in quantities that match a pie, crisp, sauce batch, or family meal so you do not have to thaw more than you need.
When the harvest exceeds your time and storage, share early. A bag of crisp apples given away on picking day is more useful than a box left warm until the whole bottom layer softens. Harvest management is not about keeping every apple yourself; it is about protecting quality while you still have choices.
A Seven-Day Harvest Plan for Galion-Area Backyards
Day 1: Identify the tree or estimate whether it is early, midseason, or late. Sample fruit from the sunny outer canopy and the shaded interior. Record ground color, texture, and flavor.
Day 2: Prepare clean shallow containers, refrigerator space, labels, and a use-soon basket. Pick only the fruit that passes several maturity checks. Keep it shaded and handle it gently.
Day 3: Sort the harvest. Refrigerate sound dry keepers in a perforated bag or loosely covered container. Move bruised but wholesome fruit to the front of the kitchen plan. Discard active decay.
Days 4–5: Taste another apple from each part of the tree. If inner fruit remains starchy or firmly attached, leave it. Prepare use-soon apples for meals, baking, or a tested freezing method.
Days 6–7: Pick the next mature group, inspect the stored fruit, and update the label. Note how much the flavor changed in one week and whether drops increased. Repeat the cycle until the tree is finished.
This slower approach may feel less efficient than one big picking, but it fits how apples actually mature. It also turns this year’s harvest into useful information for next year. At Liberty Farm, Home & Garden in Galion, we believe the best seasonal advice should help you make a better decision with what you already have. In this case, that means tasting before picking, handling each apple like a keeper, and giving every grade a sensible destination.
The Best Test Is Still the Apple
Color catches your eye, the calendar starts the conversation, and a few drops get your attention. None of them is as useful as a representative apple cut and tasted at the tree. When the background color is changing, the flesh is crisp and juicy, the flavor has arrived, and the fruit releases with a gentle lift and twist, harvest has begun.
Pick in rounds. Protect the fruiting spur. Separate keepers from use-soon apples before cooling. Store sound fruit cold with enough humidity to resist shriveling, inspect it weekly, and preserve surplus only with tested directions. Those small choices matter more than any trick.
North-central Ohio’s apple season stretches across varieties, so there is no need to force one date onto every tree. Let the apple tell you where it is in the season—and write the answer down. Next August, that record will be waiting before the first apple hits the grass.
Frequently Asked Questions
Keep Reading
Bring Houseplants Indoors Before the Chill: An Ohio Fall Transition Guide
Learn when and how to bring houseplants indoors in Ohio, inspect for pests, acclimate light, reset watering, and avoid common fall mistakes.
Home Canning in Ohio: A Safe August Guide for Garden Harvests
Learn how to match Ohio garden produce with tested water-bath or pressure-canning methods, prepare equipment, check seals, and avoid unsafe shortcuts.