
Pine Bark Mini Nuggets: The Summer Mulch Your Garden Beds Need Right Now
The dog days of summer are here, and your garden beds are losing moisture fast. Pine Bark Mini Nuggets give you a finely textured, natural mulch that stays put, looks great, and keeps working through fall — and right now is exactly the right time to apply them.
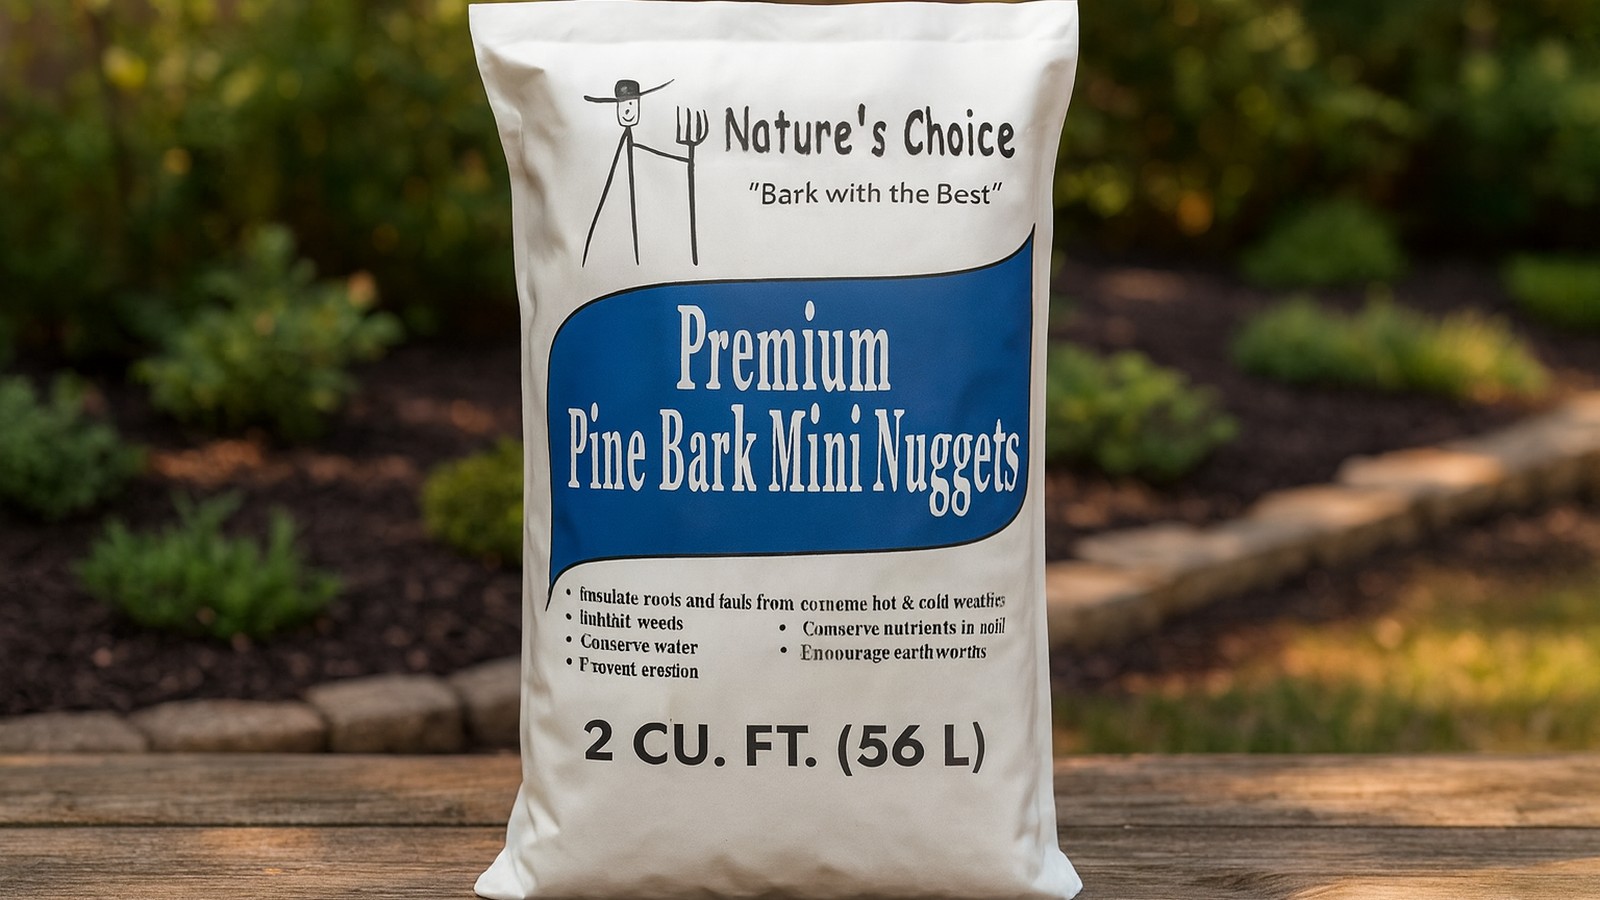
By the end of July in north-central Ohio, your garden beds have already survived weeks of heat, sporadic rain, and relentless evaporation — and the toughest stretch of summer is still ahead. A fresh layer of quality mulch is the single most effective thing you can do right now to protect roots, hold onto every drop of moisture, and keep weeds from turning your beds into a second job. Pine Bark Mini Nuggets are a finely textured, all-natural pine bark mulch sized specifically for the situations where big chunky nuggets look clunky or migrate out of place — smaller plants, tidy perennial beds, slopes, and any spot where you want a clean, finished look that actually stays put. Here's everything you need to know about applying them correctly for maximum benefit through the rest of the season.
Why Late July Is the Best Time to Mulch in Ohio
It might seem counterintuitive — shouldn't you mulch in spring and be done with it? In an ideal world, yes. But mid-season mulching in late July is one of the most impactful things you can do for your Ohio garden, and here's why the timing matters so much right now.
Crawford County and the surrounding north-central Ohio region typically sits in USDA Hardiness Zone 6, which means summers deliver genuine heat stress. July and August routinely bring high temperatures in the upper 80s and low 90s °F, often paired with stretches of dry weather between rain events. Soil surface temperatures in an unprotected, bare bed can spike 20–30°F higher than air temperature on a sunny afternoon — hot enough to damage fine feeder roots just an inch or two below the surface.
If you mulched in May, there's a good chance that layer has compressed or thinned over the past two months. Organic mulches break down, get kicked around by heavy rain, and compact from foot traffic. A layer that started at 3 inches in May may only be an inch deep now — not nearly enough to do its job. Late July is the right moment to top up or apply fresh mulch before the final hot weeks of summer arrive.
Beyond moisture and temperature, there's a weed pressure angle. Any mulch barrier that has thinned down is now letting more light reach the soil surface, which wakes up weed seeds. Getting a fresh 2–3 inch layer down now suppresses that second flush of late-summer weeds — including crabgrass, pigweed, and purslane — that typically peaks in August in Ohio gardens.
Finally, mulching now sets you up beautifully for fall. As temperatures drop in September and October, that same mulch layer will help moderate soil temperature fluctuations, giving perennial roots a gentler transition into dormancy.
What Makes Pine Bark Mini Nuggets Different From Other Mulches
Walk into any garden center and you'll see shelves of bagged mulch options: dyed hardwood, large pine nuggets, shredded bark, wood chips, and more. Understanding what sets Pine Bark Mini Nuggets apart helps you choose the right product for the right job.
Texture and scale: The "mini nugget" sizing is the key differentiator here. These are small pine bark pieces — the finest-textured pine bark mulch option available. That matters enormously in certain garden situations. Large nuggets can look visually out of proportion around small perennials, ground covers, dwarf shrubs, annual beds, or container plantings. The smaller pieces nestle neatly around plant stems and crowns without burying them or looking like you dropped a pile of wood chips on top of a delicate plant.
Staying power on slopes: If you've ever watched a heavy rain send a layer of large mulch nuggets rolling down a slope into your lawn or driveway, you'll immediately appreciate the physics here. Mini nuggets stay in place better than larger pieces on slopes and around small plants. Their smaller size, combined with the natural interlocking of irregular bark surfaces, means they resist displacement from rain and wind far more effectively than large, smooth-sided chunks.
Natural color that lasts: Many bagged mulches on the market are dyed — typically jet black or red — to achieve an attractive appearance right out of the bag. The problem is that dyed mulches fade, often dramatically, within a single season. Pine Bark Mini Nuggets are natural pine bark that doesn't fade as fast as dyed mulch. The warm reddish-brown of natural pine bark weathers gracefully to a softer tone over time, rather than bleaching out to a washed-out gray-brown by August.
Bag size: Each bag contains 2 cubic feet of material — a practical size that's easy to carry, stack, and apply without waste. For most gardeners, calculating how many bags you need is straightforward (more on that below).
Where to Use Pine Bark Mini Nuggets: The Right Bed for the Right Mulch
Not every mulch is the right fit for every garden situation. Pine Bark Mini Nuggets excel in specific settings — knowing where they shine helps you get the most value out of every bag.
Perennial Flower Beds
This is perhaps the single best use case. Perennial beds typically feature a mix of plant sizes and densities, with crowns that need airflow and stems that shouldn't be buried. The fine texture of mini nuggets allows you to tuck mulch close to plant crowns without smothering them, and the smaller pieces look proportional and tidy around mid-size plants like coneflowers, black-eyed Susans, daylilies, and hostas — all common sights in Ohio home gardens.
Sloped Beds and Terraces
If your property has any grade to it — even a gentle slope along a foundation or a more dramatic terrace — mini nuggets are a smarter choice than large nuggets or shredded material. Their weight-to-surface-area ratio helps them resist the runoff from Ohio's summer thunderstorms, which can arrive fast and heavy in July and August.
Around Small Shrubs and Foundation Plantings
Dwarf varieties of junipers, spirea, boxwood, and similar foundation plants benefit from a mulch that matches their scale. Large nuggets around a small shrub can look oddly industrial. Mini nuggets create a finished, intentional appearance that complements the planting rather than competing with it.
Annual Flower and Vegetable Bed Pathways
For kitchen gardeners who want a tidy, low-maintenance path between raised rows or around in-ground vegetable beds, pine bark mini nuggets provide good weed suppression and improve the look of the space considerably without the dusty, muddy mess of bare soil.
Container Gardens and Deck Planters
A thin top-dressing of mini nuggets in large containers and deck planters can significantly slow moisture evaporation from the soil surface — especially useful during Ohio's hottest weeks when containers may need daily watering. The natural color also adds a finished, professional look to container displays.
How to Calculate How Many Bags You Need
One of the most common mistakes homeowners make is either buying too little mulch (ending up with a thin, ineffective layer) or far too much (wasting money and storage space). The math is simple once you know a few numbers.
The recommended application depth for Pine Bark Mini Nuggets is 2–3 inches. For most established beds with existing plants, 2 inches is appropriate for a top-up application over existing mulch. If you're starting fresh on a bare bed, go for the full 3 inches.
Each bag contains 2 cubic feet of material. Here's the formula:
Square footage of bed × depth in feet ÷ bag size in cubic feet = number of bags
Convert your depth to feet: 2 inches = 0.167 feet; 3 inches = 0.25 feet.
- A 10 × 10 ft bed (100 sq ft) at 2 inches deep: 100 × 0.167 ÷ 2 = 8–9 bags
- A 10 × 10 ft bed (100 sq ft) at 3 inches deep: 100 × 0.25 ÷ 2 = 12–13 bags
- A 4 × 20 ft foundation border (80 sq ft) at 2 inches deep: 80 × 0.167 ÷ 2 = 6–7 bags
- A 6 × 6 ft perennial bed (36 sq ft) at 2 inches deep: 36 × 0.167 ÷ 2 = 3 bags
Always round up by one bag. Running short mid-job is far more disruptive than having a bag or two left over. Unopened bags store cleanly for the next project.
If measuring your beds feels daunting, a quick tip: sketch each bed as a rough rectangle (or break oddly shaped beds into smaller rectangles), measure length and width with a tape measure, and add the totals. You don't need to be perfectly precise — within 10% is close enough for mulch planning.
Step-by-Step: How to Apply Pine Bark Mini Nuggets Correctly
Good application technique makes a significant difference in how long your mulch performs and how good it looks. Follow these steps for a result that works as well as it looks.
- Edge your beds first. Before you open a single bag, re-cut any bed edges that have blurred over the summer. A clean edge keeps mulch contained and gives the finished bed a crisp, intentional look. A flat-bladed spade or a dedicated edging tool works well for this.
- Pull existing weeds. Mulch suppresses new weeds from germinating, but it will not kill weeds that are already growing. Take 15–20 minutes to hand-pull or hoe out any weeds currently in the bed. Pay special attention to perennial weeds like thistle or bindweed — get the root, not just the top.
- Water the bed if it's very dry. If the soil is bone dry, give the bed a deep watering the day before you mulch. Mulch traps moisture in, but it can't create it. Starting with adequately moist soil means your plants benefit from that moisture being preserved right from day one.
- Assess existing mulch depth. If there's existing mulch, probe it with your finger or a pencil to see how deep it is. If it's already 2 inches or more, you may only need a light 1-inch refresh. If it's less than 1 inch (or compacted into a mat), remove the old layer or loosen it with a rake before adding fresh material.
- Apply the mini nuggets. Pour or scoop the nuggets from the bag and spread them by hand or with a garden rake. Work from the edges of the bed inward. Aim for an even depth of 2–3 inches across the entire bed surface.
- Keep mulch away from plant crowns and stems. This is the most important technical rule in mulching. Leave a 2–3 inch gap between the mulch and the crown or base stem of every plant. Piling mulch against stems traps moisture against the bark, encourages rot, and creates habitat for insects and rodents. This applies especially to shrubs and small trees — never create a "mulch volcano" against a trunk.
- Water after application. A light watering after spreading settles the nuggets slightly, begins the process of integrating the mulch with the soil surface, and delivers a bit of moisture to the root zone. It also helps the bed look uniform and tidy.
- Check depth once more. After watering and settling, verify you still have adequate depth. Mini nuggets settle only slightly, but it's worth a quick check before you put the tools away.
Summer Mulching Scenarios: A Quick-Reference Guide
Every garden situation is a little different. Use this table to match your specific scenario to the right approach for applying Pine Bark Mini Nuggets this July.
| Scenario | Recommended Depth | Key Tip |
|---|---|---|
| Fresh bare bed, no existing mulch | 3 inches | Weed thoroughly first; wet soil before applying |
| Top-up over thinned existing mulch (1 inch or less remaining) | Add 1.5–2 inches | Loosen compacted old mulch with a rake before adding fresh layer |
| Sloped or terraced bed | 2.5–3 inches | Press nuggets gently by hand after spreading; re-check after first rain |
| Around small perennials and ground covers | 2 inches | Keep a 2-inch clear zone around each crown; use a trowel to tuck carefully |
| Foundation shrub planting | 2–3 inches | Maintain 3-inch gap from all shrub stems; never pile against foundation |
| Container top-dressing | 0.5–1 inch | Leave enough clearance for watering without overflow; check drainage |
| Product | Pine Bark Mini Nuggets 2 cf — 2 cf per bag, apply 2–3 inches deep | |
| Available At | Liberty Farm, Home & Garden - Galion, Ohio | libertyfhg.com | |
Maintaining Your Mulched Beds Through August and Into Fall
Applying mulch is not entirely a set-it-and-forget-it operation — though it comes close. A little attention through the rest of the season keeps your beds performing at their best.
Monitoring Depth After Heavy Rain
Ohio summers frequently deliver intense, fast-moving thunderstorms. After a significant rain event, walk your beds and look for areas where the mulch has washed thin, particularly on any sloped sections. Mini nuggets hold up better than larger pieces in these situations, but it's still worth a quick check. Add material to any thin spots right away — a gap in coverage is a gap where weeds will find footing.
Fluffing Compacted Mulch
Over time, even mini nuggets can begin to compact slightly at the surface, forming a crust that actually sheds water rather than letting it pass through to the soil. Every three to four weeks, run a garden rake lightly over the mulch surface — just enough to loosen the top half-inch. This breaks up any surface crust and helps rain and irrigation water penetrate effectively.
Watching for Fungal Growth
In warm, humid Ohio summers, you may occasionally notice small fungal structures — sometimes called "artillery fungus" — appearing on the surface of organic mulches, including pine bark. This is normal and not harmful to plants. If it's a concern aesthetically, turning the mulch occasionally reduces the conditions that encourage fungal growth. Pine bark is actually less prone to certain fungal issues than hardwood mulches.
Fall Top-Up
As September arrives and temperatures begin to moderate, evaluate your mulch depth one more time. If the layer has thinned to less than 1.5 inches by mid-September, add enough fresh material to bring it back to 2–3 inches before the first frost. That final layer is what will insulate roots through freeze-thaw cycles in November and December — a real benefit in Zone 6 where soil temperatures fluctuate significantly before hard freeze sets in.
Common Mulching Mistakes to Avoid This Summer
After years of gardening conversations, the same mistakes come up repeatedly. Here's how to sidestep the most common ones before they cost you plants, time, or money.
Mulching too thin. A 1-inch layer looks like it's doing something but provides almost no meaningful weed suppression and only modest moisture retention. The 2–3 inch depth recommendation exists for good reason — don't cut corners here.
Mulching too thick. The opposite error is equally damaging. Piling 5–6 inches of mulch smothers soil oxygen, suffocates shallow roots, and creates waterlogged conditions at the soil surface. Stick to the recommended depth range.
Applying mulch over dry, cracked soil without watering first. Mulch locks in whatever moisture is present — if the soil is already bone dry, you're just locking in drought. Water deeply before you mulch during hot stretches.
Burying plant crowns. This mistake is responsible for more plant losses than most gardeners realize. Stems and crowns buried in consistently moist mulch rot. Keep that 2–3 inch buffer zone clear around every plant base, without exception.
Ignoring bed edges. Mulch that spills over bed edges into the lawn creates a mess and can contribute to thatch or fungal problems at the lawn edge. Maintain clean, defined edges before you mulch and check them periodically.
Using mulch as a substitute for soil amendment. Mulch sits on top of the soil and improves surface conditions, but it doesn't replace the need for compost or fertilizer to feed plants from below. If your beds haven't been fertilized this season, address that separately — mulching on top of depleted soil gives you protected depleted soil.
Stop by Liberty Farm, Home & Garden at 222 S. Liberty St. in Galion if you have questions about combining mulching with a fertilization plan for your specific beds. The staff can help you think through what your beds need for the rest of the season.
Get Your Bags Before the Weekend: Why July Timing Matters for Availability
Late July is prime mulching season across Ohio, and bagged mulch moves quickly at this time of year — particularly a fine-textured, natural product like pine bark mini nuggets that tends to appeal to homeowners who care about how their beds look as much as how they function. If you're planning to tackle a mulching project this weekend or next, it's worth picking up your bags sooner rather than later.
From a practical standpoint, mulching in early morning or on a slightly overcast day is more comfortable for you and slightly better for the plants — you're not working soil that has been baking in direct afternoon sun. August heat is coming, and getting this done in the next week or two means your beds will be protected before the hottest stretch of summer hits.
You can pick up Pine Bark Mini Nuggets in 2 cf bags at Liberty Farm, Home & Garden, located at 222 S. Liberty St. in Galion, Ohio. It's worth calculating your square footage before you go so you can grab the right number of bags in one trip — use the formula and examples from the earlier section of this guide, and round up by one.
Whether you're freshening up a single perennial bed, tackling an entire foundation planting, or finally getting that sloped border under control, a few hours this weekend and a handful of bags of mini nuggets will make a visible, lasting difference through the rest of summer and well into fall.
Frequently Asked Questions
Keep Reading
Plant Cover Crops Now: An Ohio Home Garden Guide
Plant fall cover crops in an Ohio vegetable garden with practical guidance on timing, species, seeding, winter care, and spring termination.
Save This Summer’s Garden: A Practical Ohio Seed-Saving Guide
Save tomato, bean, pea, lettuce, marigold, zinnia, and other garden seeds with this practical late-summer guide for Galion and north-central Ohio.